Introduction
It started at 3:17am.
I know because I checked my phone when I got back into bed.
It was winter. Proper winter. The kind where you wake up because the room temperature quietly dropped just enough to make you uncomfortable.
My bedroom is upstairs.
The thermostat was downstairs.
An old Honeywell unit. Manual. Plastic wheel. No WiFi. No intelligence.
So there I was, half asleep, wrapped in a blanket, debating whether I should:
- Accept my fate and freeze until morning
- Or walk downstairs into the cold to manually increase the temperature
I chose the stairs.
Cold floor. Cold air. Slightly annoyed engineer.
When I turned that little plastic wheel and heard the boiler click, I had a very clear thought:
Why am I manually rotating plastic in 2022 like it’s 1998?
That was the beginning of my DIY smart thermostat.
The Real Problem (It Wasn’t Just “Smart Home”)
This wasn’t about gadgets.
It was a systems problem.
The thermostat was installed in the living room downstairs.
But the temperature that mattered at night was upstairs in the bedroom.
The heating decision was being made in the wrong location.
Sensor placement ≠ user comfort location.
Classic distributed systems issue.
I wanted:
- Control from my phone
- Integration with Google Assistant
- Smarter scheduling
- The ability to base heating decisions on upstairs temperature
- And most importantly: local control if everything else fails
Because if Home Assistant goes down at 3am and I can’t turn the heater on, that’s not “smart”.
That’s fragile.
Phase 1 - Breadboard Prototype
Like every embedded project, it started messy.
On a breadboard I wired:
- ESP8266 (Wemos D1 Mini)
- Small SSD1306 OLED display
- Two physical push buttons
- Relay module for boiler control
- Temperature sensor
- A few resistors and transistors for clean switching
Firmware: ESPHome
Integration: Home Assistant
The goals at this stage were simple:
- Validate relay switching
- Validate temperature readings
- Implement a basic thermostat control loop
- Ensure safe boiler control
- Confirm HA integration
No enclosure yet. No polish. Just make it reliable.
And this is important: I did not start with aesthetics.
I started with stability.
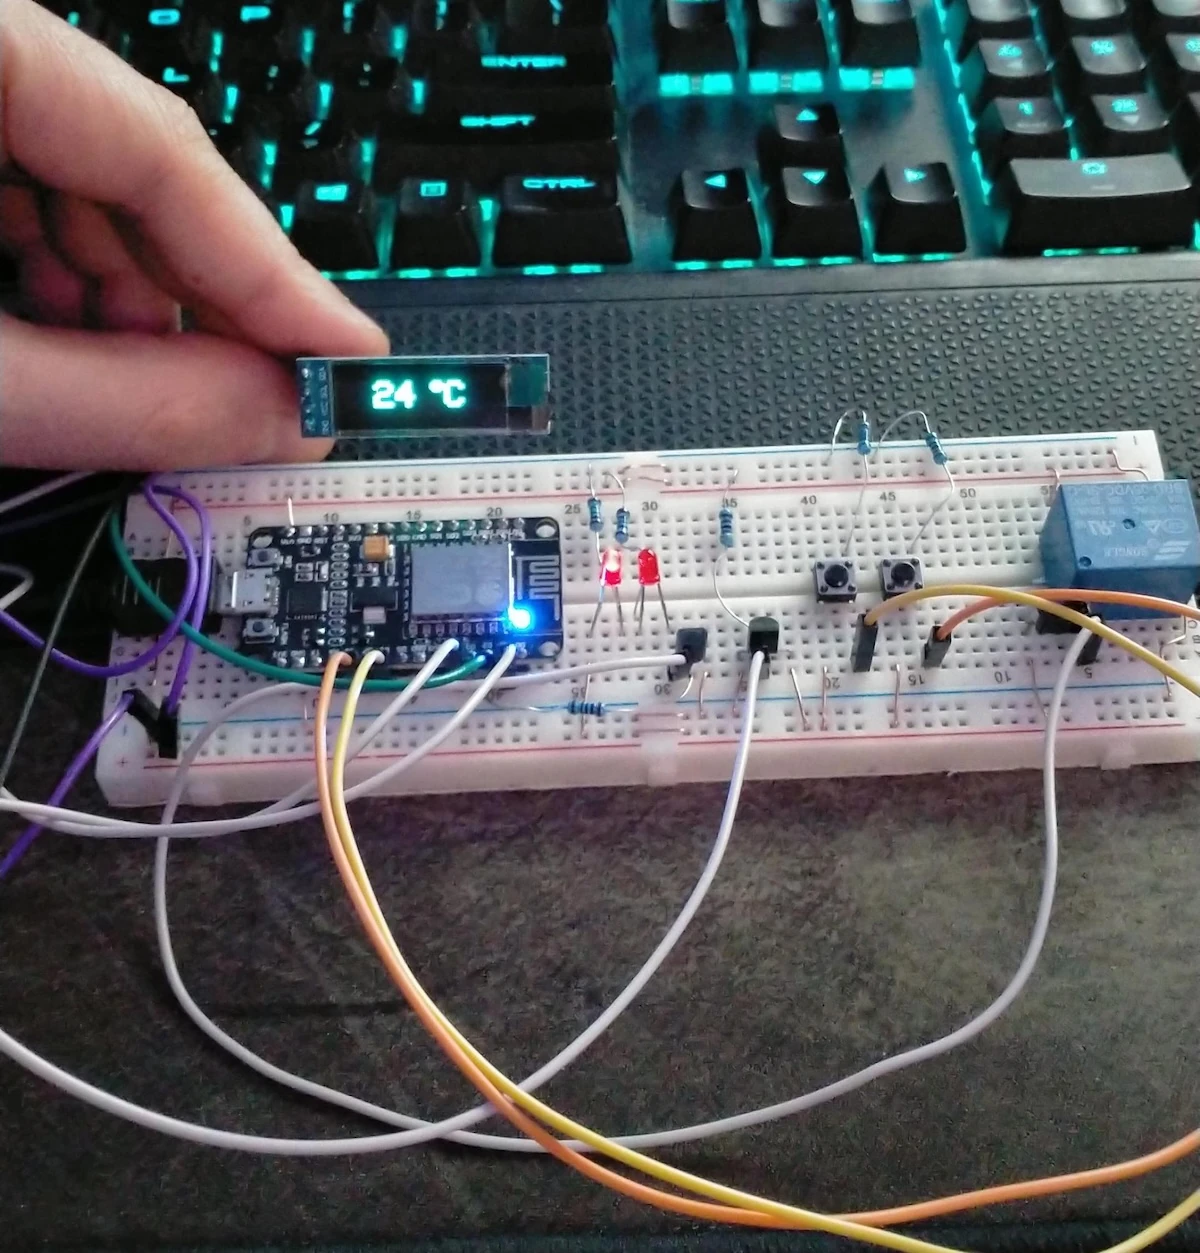
Phase 1 prototype on the bench: messy, functional, and exactly what it needed to be.
The Non-Negotiable Requirement: It Must Work Without Home Assistant
The two physical buttons are there for one reason:
Manual fallback.
If:
- Home Assistant crashes
- WiFi drops
- I break something while “improving” the cluster
- Or the Raspberry Pi decides to reboot at the wrong moment
The thermostat must still function.
The control loop runs locally on the ESP.
Buttons allow manual setpoint adjustment.
The display shows the temperature.
No cloud dependency. No external API requirement. No single point of failure.
Smart features are additive.
Core heating control is local.
That was a deliberate architectural decision.
Phase 2 - 3D Printed Wall Unit
Once the electronics proved stable, I designed a custom enclosure.
Requirements:
- Minimal footprint
- Wall-mountable
- Clean front plate
- Visible OLED window
- Accessible buttons
- Enough airflow to avoid internal heat affecting readings
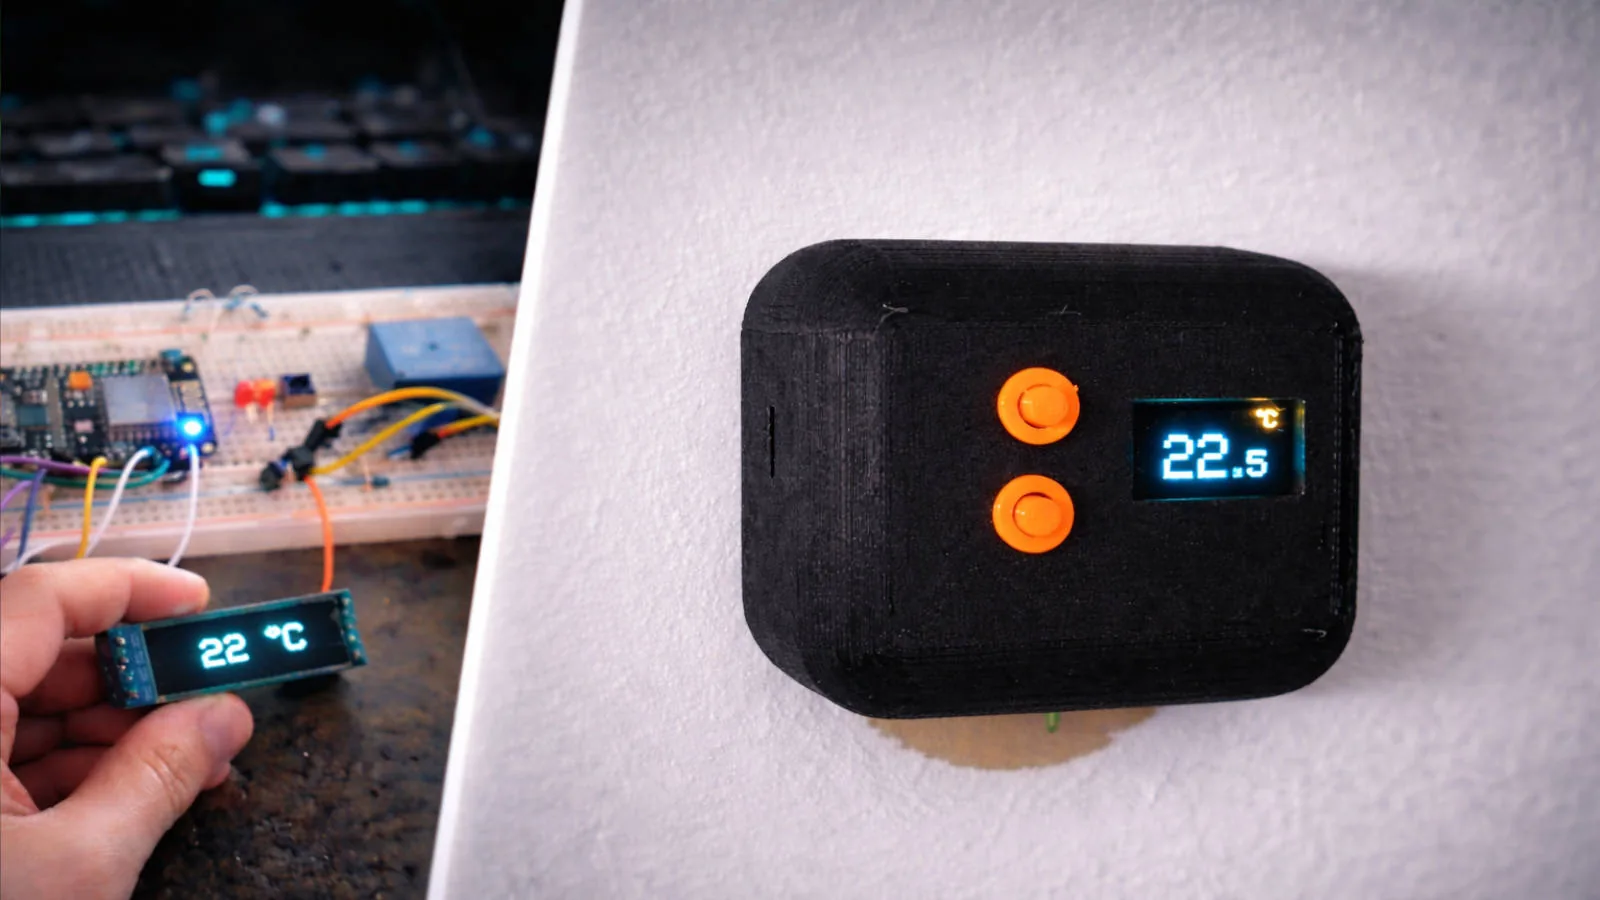
I printed a simple matte black housing with two orange buttons.
It doesn’t scream “DIY”.
It looks intentional.
The original Honeywell came off the wall.
My device replaced it.
And it has now been running for four years.
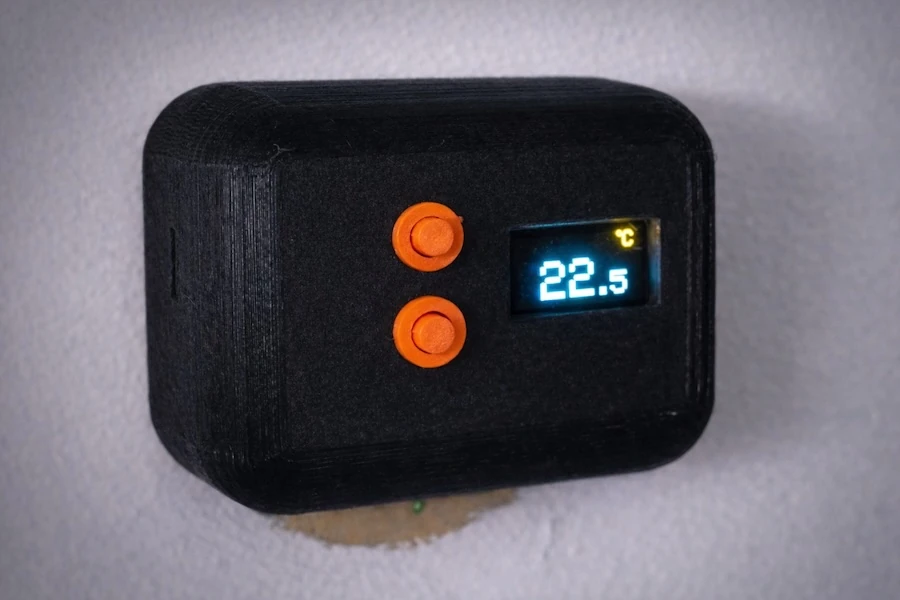
Final 3D printed wall unit installed in place of the original thermostat.
Technical Deep Dive
Hardware
- ESP8266 (Wemos D1 Mini)
- SSD1306 OLED display (I2C)
- Mechanical relay for boiler control
- Physical push buttons (GPIO inputs with pull-ups)
- Temperature sensor placed externally to avoid enclosure heat bias
The relay controls the same low-voltage circuit the Honeywell thermostat did.
Nothing fancy. Just a controlled switch.
Firmware (ESPHome)
ESPHome made this extremely clean:
climatecomponent for thermostat logic- Local control loop
- Button triggers mapped to setpoint adjustment
- Display lambda to render temperature + setpoint
- OTA updates
- Native Home Assistant API integration
No MQTT layer. No custom firmware from scratch.
Fast iteration. Declarative config. Stable runtime.
Home Assistant Integration
Home Assistant handles:
- Scheduling
- Google Assistant exposure
- Automation rules
- Logging & history
- Dashboard control
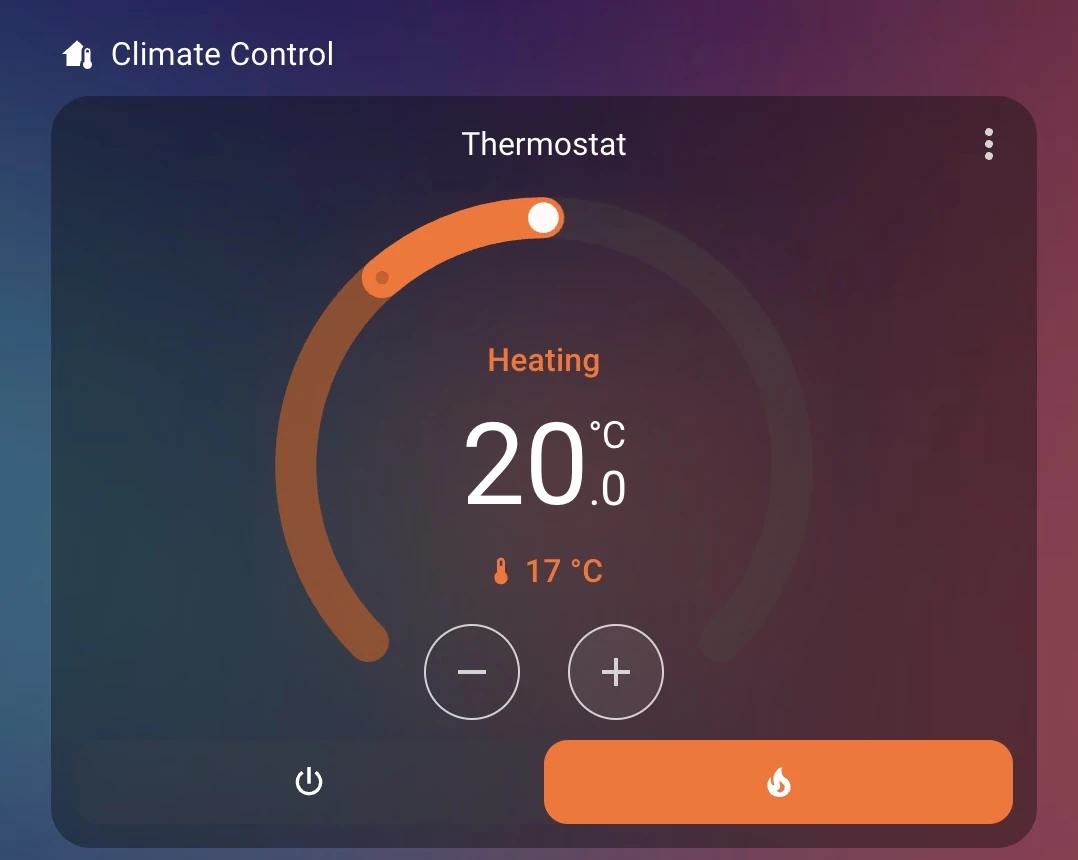
Home Assistant climate widget used for scheduling, visibility, and remote control.
The important part:
If Home Assistant is online -> enhanced functionality.
If Home Assistant is offline -> heating still works.
That separation is intentional.
Reliability Observations (4 Years Later)
This device has:
- Survived multiple WiFi outages
- Survived Home Assistant restarts
- Survived firmware updates
- Run continuously for years
No relay welding.
No OLED burn-in issues.
No random resets.
Most DIY smart home projects work for a weekend.
Very few are production-stable in a real house.
Four years changes the classification.
It stopped being a hobby project.
It became infrastructure.
What I Actually Learned
This project reinforced a few principles I now apply everywhere:
1. Local-first architecture wins
If your heating depends on a server in a rack, you designed it wrong.
Core functionality must be autonomous.
Enhancements can be centralized.
The same principle applies to distributed backend systems.
2. Simplicity beats overengineering
I could have:
- Added a touchscreen
- Added animations
- Added more sensors
- Made it “fancier”
Instead I kept:
- Two buttons
- One small OLED
- A relay
- A clean control loop
It works because it’s simple.
3. Hardware forces discipline
In backend systems you can patch things quickly.
In hardware mounted on a wall, you design carefully because replacing it is annoying.
That changes how you think.
Would I Redesign It Today?
Maybe:
- ESP32 instead of ESP8266
- Proper custom PCB instead of perfboard then hand soldered PCB
- Solid state relay
- Better temperature probe placement
But honestly?
It works.
And embedded rule number one is:
If it runs stable, don’t touch it.
Closing Thought
This entire system exists because I didn’t want to freeze for 30 seconds walking downstairs.
But that 3am annoyance led to:
- A custom embedded device
- A wall-mounted 3D printed enclosure
- A locally autonomous thermostat
- Full Home Assistant integration
- Four years of uninterrupted uptime
Some of the best engineering projects don’t start with innovation.
They start with discomfort.
And a slightly annoyed engineer.